How to Make Favorite Japanese Angel Soft Milk Loaf
Hello everybody, it's Brad, welcome to our recipe site. Today, I'm gonna show you how to prepare a special dish, Recipe of Award-winning Japanese Angel Soft Milk Loaf. It is one of my favorites food recipes. This time, I will make it a little bit tasty. This will be really delicious.
When it comes to cooking healthful meals for our own families, there's always some amount of dissention among the positions. The good news is that there are recipes that have become healthy but the nutritious nature of these recipes is somewhat concealed. What they don't know in these instances shouldn't attract harm their way (out of allergies, which should not be discounted ).
This usually means at any given time in your cooking cycles there is quite probably some one somewhere that is better and/or worse at cooking than you personally. Take advantage of this as the very best have bad days in terms of cooking. There are various people who cook for different factors. Some cook in order to eat and survive although some cook since they actually like the whole process of cooking. Some cook through the times of emotional upheaval among others cookout of sheer boredom. No matter your reason behind cooking or learning to cook you need to begin with the basics.
There are lots of magazines and books that are filled with recipes which encourage healthy cooking and eating habits. If you genuinely want to cook, then there isn't any lack of recipes that you are able to take to out along the way. The great good thing is you may incorporate healthy cooking in your cooking regular whether you're cooking for a household .
Many things affect the quality of taste from Japanese Angel Soft Milk Loaf, starting from the type of ingredients, then the selection of fresh ingredients, the ability to cut dishes to how to make and serve them. Don't worry if you want to prepare Japanese Angel Soft Milk Loaf delicious at home, because if you already know the trick then this dish can be used as an extraordinary special treat.
As for the number of servings that can be served to make Japanese Angel Soft Milk Loaf is small 8 (16). So make sure this portion is enough to serve for yourself and your beloved family.
Just in addition, the time it takes to cook Japanese Angel Soft Milk Loaf estimated approx about 3 hours.
To begin with this recipe, we must first prepare a few components. You can cook Japanese Angel Soft Milk Loaf using 16 ingredients and 17 steps. Here is how you cook it.
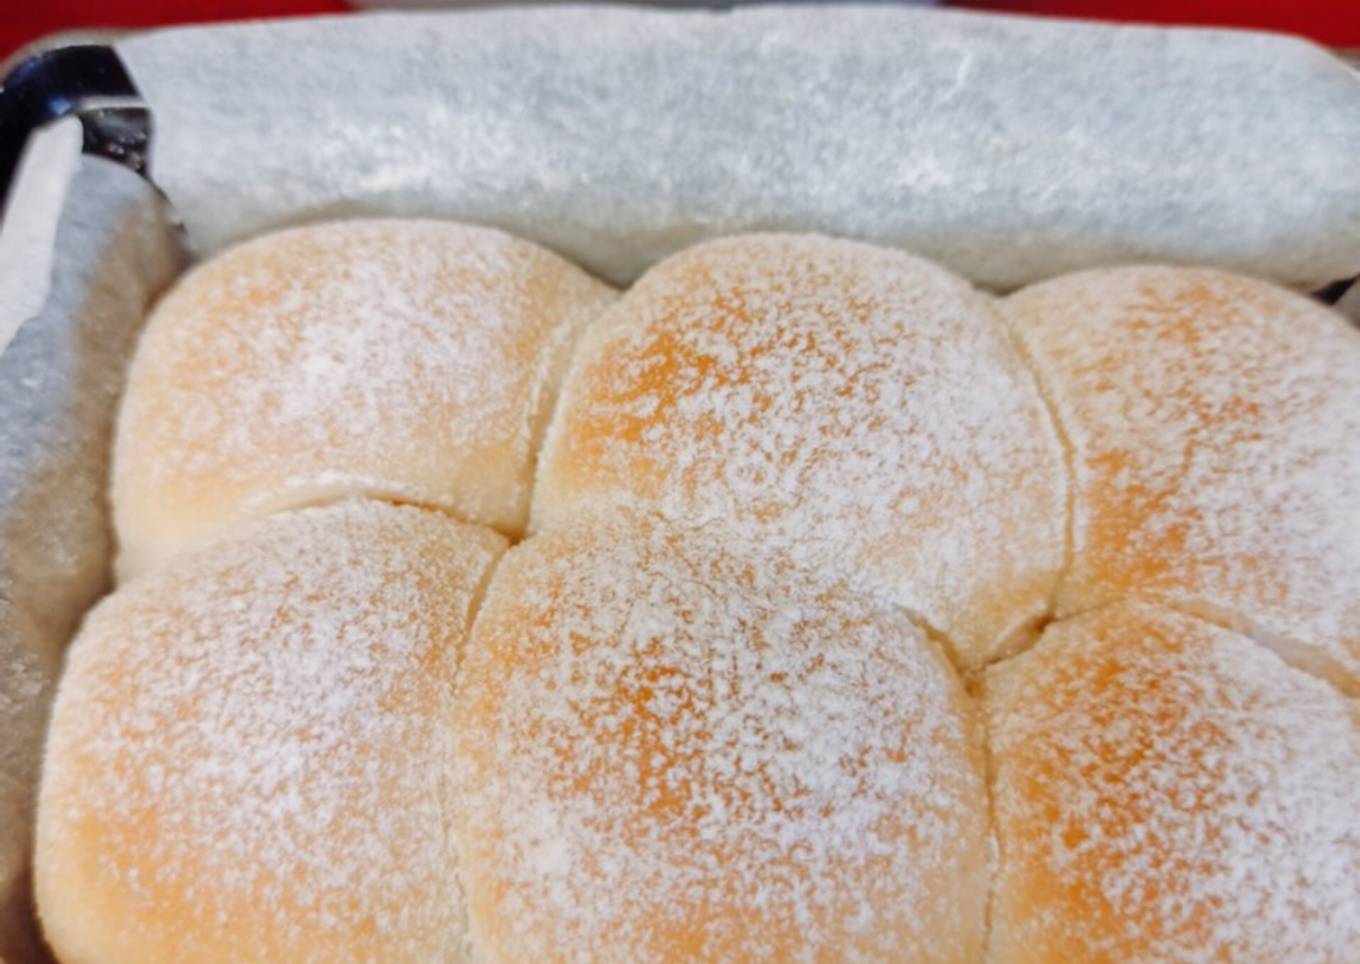
It is a Japanese style super soft milk bread. It is perfect as dinner rolls. It reminds me of my childhood!
Here is the video to show you how soft they are:
https://www.instagram.com/p/B_YWiW6nIfo/?utm_source=ig_web_copy_link
As I live alone, I used small bakeware which is 9x14x7cm and I used six balls and two balls in 11cm cocotte. So, they are quite a small portion. They will serve for only one or two people.
Ingredients and spices that need to be Make ready to make Japanese Angel Soft Milk Loaf:
- 92 g (184g, not ml) whole milk or (12g skim milk and 80g water)
- 1.5 g (3 g) dry yeast
- 125 g (250 g) strong flour or wholemeal flour
- 15 g sugar (30g)
- 1.5 g or 1/4 tsp (3g or 1/2 tsp) salt
- 10 g (20 g) unsalted butter, room temperature (If you use salted butter, reduce the salt amount.)
- nuts and seeds - option
- 【With 120g raisin yeast starter dough】 example
- 120 g (240 g) raisin yeast starter dough
- 65 g (130 g) strong flour = 125-(120/2)
- 20 g (40 g) whole milk = 92x0.87 -(120/2)
- 4 g (8 g) skim milk = (120/2)x0.13
- No dry yeast
- The rest of the ingredients remain the same
- Rasin Yest starter at:https://cookpad.com/uk/recipes/13322647
Instructions to make Japanese Angel Soft Milk Loaf
- Lay parchment sheet or oil the bread tin
- Heat the milk in a microwave about 20 (40) seconds to make it warm. Or just heat it up in a pan. Please never make it too hot as yeast will die at 60 degrees. Around the temperature of bath would be perfect. If it is too hot, leave it till it becomes warm.

- Add yeast into the warm milk and mix well.

- Add flour, sugar, salt in a bowl or on board and mix them. Then, add the warm milk and mix them. Then, knead by hands for about 10 mins on a board or knead for about 7-10 mins with a stand mixer using a kneading hook until gluten has created and the dough does not stick to the bowl. The time will depend on your machine.
- Please knead well here until the dough becomes stretchy and gluten is formed. When gluten is formed, you touch the dough and it doesn't stick to your hand. Also if you stretch it becomes very thin sheet almost see-through it. I use speed 2 or 3 on my stand mixer. If you too strong, it becomes very sticky.


- Add chopped or soft butter and knead further for about 3-5 mins until the dough becomes smooth and not stick to the bowl like the last photo. It should look silky and smooth.


- Take the dough out and make it round with the motion on tucking inside at the bottom. It should become smooth like the photos below. If it is still too sticky, you need to knead with hands until it becomes easier to handle it. I usually hit it like a ball and it will become less sticky and smooth.
Add seeds or nuts if you wish. Cover it with cling film and leave it for 30-40 mins until it becomes about twice. It can take much longer. I put a hot water with 36-45℃ beneath like the last photo.


- Test the fermentation with a finger coated by flour. If it is the hole remains, the first fermentation has been done.


- After having tested the fermentation, take out the dough and punch it down. Make it round again. Cut it into 8 (16) or 6 (12) pieces depends on how you like. Make them round. Place them in with the tucked parts as the bottom. Cover it with a damp cloth and leave 15 mins.
(You could omit this resting step. However, you will get a better result if you do. When I prepare at night and leave them in the fridge, I omit it as it seems it does not make many differences, if I leave them in the fridge.)


- Make them round again with the motion of tucking and place them in the bread tin with the tucked parts on the bottom. Add some more seeds on the top, if you wish.
(If you wish to bake them in the morning, you could leave them overnight in the fridge till next morning.)

- Leave it in a warm place until it becomes 2-2.5 times, usually for about 30-60 mins, depends on the room temperature and the yeast. Dust them with flour. (The second fermentation)
If you left them in the fridge overnight, please put them in a warm water bath beneath or something. Otherwise, it will take for ages to get this second fermentation done. When the yeast was strong, it is already ready to bake when you take out from the fridge. Then, omit the second fermentation. )


- Preheat the oven at 180℃.
- Put the bread tin in the oven and turn down the temperature as 160℃.
Then, bake at 160℃ for about 18 mins. Please make sure you reduce the temperature to 160℃. If you bake at 180℃, your bread becomes harder. If your oven is powerful enough and it does not go down the temperature when you open, just preheat it as 160℃.


- After having baked for 18 mins, it is done. You can see the video of how soft they are at: https://www.instagram.com/p/B_YWiW6nIfo/?utm_source=ig_web_copy_link


- You can make character breads with this dough such as bear, cat, Totoro, rabbits etc which children love.
Bear recipe is here. https://cookpad.com/uk/recipes/12351787-milk-bear-loaf


- Decorated with those.


It's those tiny actions that you take towards your objective of cooking healthy foods for the family which may matter far more than any creature leap. Before you know it you may find that you all have more energy and a greater understanding of general wellbeing than you'd have envisioned before changing your eating habits. If this isn't enough to encourage you however, you can always check out the excuse to go shopping for new clothes once you lose a size or 2.
So that is going to wrap it up with this special food How to Prepare Perfect Japanese Angel Soft Milk Loaf. Thank you very much for your time. I'm sure you will make this at home. There is gonna be more interesting food in home recipes coming up. Remember to bookmark this page on your browser, and share it to your loved ones, friends and colleague. Thank you for reading. Go on get cooking!